 Pin It
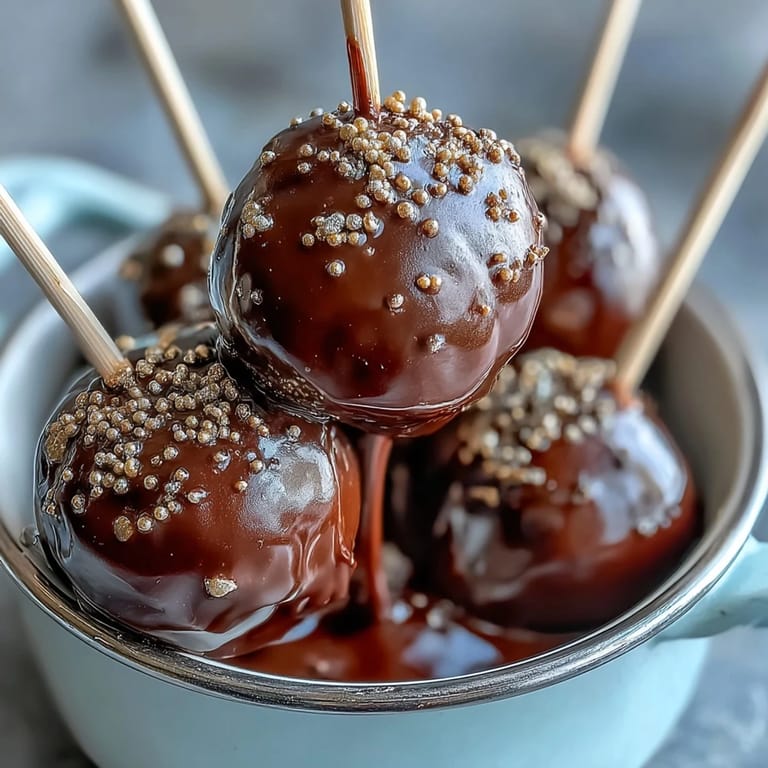
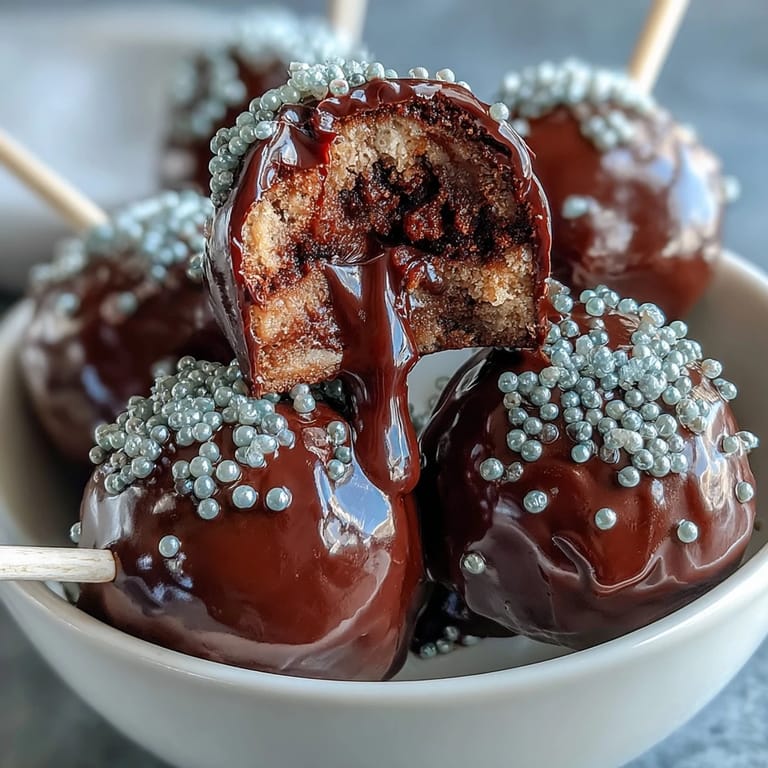
 These Pot of Gold Cake Pops bring the magic of St. Patrick's Day to life with whimsical charm and irresistible chocolate flavor. Each cake pop is crafted to resemble a miniature cauldron overflowing with edible gold treasure, combining rich chocolate cake centers with a glossy black candy coating and shimmering golden sprinkles. Perfect for festive celebrations, party favors, or simply adding a touch of Irish-inspired sweetness to your dessert table, these delightful treats are as fun to make as they are to eat.
Pin It The beauty of these cake pops lies in their versatility and the joy they bring to any gathering. The chocolate cake base provides a moist, flavorful foundation that pairs beautifully with the sweet frosting and candy coating. The striking black and gold color scheme creates an eye-catching presentation that captures the essence of a leprechaun's treasure pot. Whether you're hosting a St. Patrick's Day party or simply looking for a creative dessert project, these cake pops deliver both visual appeal and delicious taste in every bite.
Ingredients
Tired of Takeout? 🥡
Get 10 meals you can make faster than delivery arrives. Seriously.
One email. No spam. Unsubscribe anytime.
- Cake: 1 box (400 g) chocolate cake mix, plus eggs, oil, and water as required by package
- Frosting: 120 g (½ cup) chocolate frosting, store-bought or homemade
- Decoration: 400 g (14 oz) black candy melts
- 48 g (2 oz) gold sprinkles or edible gold pearls
- 24 lollipop sticks
- 50 g (1.75 oz) white candy melts, optional for accents
- Optional: Green fondant or sprinkles for shamrocks
Instructions
- Step 1: Bake the Cake
- Preheat oven and prepare the chocolate cake according to package instructions. Bake, then allow to cool completely.
- Step 2: Crumble the Cake
- Crumble the cooled cake into fine crumbs in a large bowl.
- Step 3: Mix with Frosting
- Add chocolate frosting to the crumbs and mix until a dough-like consistency forms.
- Step 4: Shape the Pots
- Scoop and roll the mixture into 24 balls (about 1.5 inches in diameter). Flatten the tops slightly to mimic a pot shape.
- Step 5: Chill
- Place balls on a parchment-lined tray and refrigerate for 30 minutes.
- Step 6: Melt Candy Coating
- Melt black candy melts according to package instructions.
- Step 7: Insert Sticks
- Dip the tip of each lollipop stick into the melted candy, then insert it halfway into each cake ball.
- Step 8: Set the Sticks
- Chill for 10 minutes to set the sticks.
- Step 9: Coat with Black Candy
- Dip each cake pop fully into melted black candy melts, letting excess drip off. Stand upright in a styrofoam block or cake pop stand.
- Step 10: Add Gold Treasure
- Before the coating sets, immediately decorate the tops with gold sprinkles to resemble coins.
- Step 11: Add Details
- For extra detail, pipe a rim around the top of each pot with additional melted black or white candy melts.
- Step 12: Optional Shamrock Accents
- Add green fondant or sprinkles for shamrock accents, if desired.
- Step 13: Final Set
- Let cake pops set completely before serving.
Zusatztipps für die Zubereitung
For the smoothest coating, ensure your candy melts are at the right consistency—not too thick or too thin. If the melts become too thick, add a small amount of vegetable oil or candy coating thinning wafers to achieve the perfect dipping consistency. When inserting the lollipop sticks, make sure not to push them all the way through the cake balls, as this can cause them to crack. Work quickly when adding the gold sprinkles, as the candy coating sets rapidly. If you're new to making cake pops, practice with a few first to get comfortable with the dipping technique. Room temperature cake balls dip more smoothly than very cold ones, so let them sit for a few minutes after removing from the refrigerator.
Varianten und Anpassungen
Transform these cake pops for different occasions by changing the color scheme—use orange and black for Halloween, red and green for Christmas, or pastel colors for Easter. For a gluten-free version, substitute with gluten-free cake mix and ensure all decorations are certified gluten-free. Create different cake flavors by using vanilla, red velvet, or funfetti cake mix instead of chocolate. For an adult-friendly version, add a tablespoon of Irish cream liqueur to the frosting mixture. You can also experiment with different coating colors—try green candy melts for shamrock pots or rainbow-colored coatings for a more vibrant leprechaun theme. For those who prefer less sweet treats, reduce the frosting amount slightly or use cream cheese frosting instead of chocolate.
Serviervorschläge
Display these Pot of Gold Cake Pops standing upright in a styrofoam block covered with green tissue paper or felt to resemble grass, creating a charming leprechaun's garden scene. Arrange them on a dessert table alongside Irish coffee, hot chocolate, or green-tinted beverages for a complete St. Patrick's Day spread. Package individual cake pops in clear cellophane bags tied with green ribbons as party favors or edible gifts. Serve them as part of a dessert buffet with other Irish-themed treats like shamrock cookies or mint chocolate brownies. For a more elaborate presentation, create a rainbow display by adding cake pops in various colors leading to your pot of gold pops. Store finished cake pops in an airtight container at room temperature for up to 3 days, or refrigerate for longer storage—just bring them to room temperature before serving for the best texture and flavor.
 Pin It
 These Pot of Gold Cake Pops capture the spirit of St. Patrick's Day with their playful design and delicious chocolate flavor. Whether you're making them for a festive celebration, as a fun kitchen project with family, or simply to bring a smile to someone's face, these charming treats deliver sweetness and whimsy in every bite. The combination of moist chocolate cake, creamy frosting, and glossy candy coating creates a texture and flavor experience that both children and adults will love. So gather your ingredients, embrace your creative side, and enjoy crafting these delightful edible treasures that truly are worth their weight in gold.
Recipe Questions & Answers
- → How do I ensure cake balls hold their shape?
Mix cake crumbs thoroughly with frosting until a dough-like consistency is achieved. Chill the shaped balls before coating to firm them up.
- → What’s the best way to prevent cracking during coating?
Melt candy melts gently and dip quickly at room temperature. Avoid moisture and allow cake balls to be well chilled before dipping.
- → Can I substitute decorations for a different look?
Yes, edible glitter or colored sprinkles can replace gold accents while maintaining a festive appearance.
- → How should these treats be stored?
Store in an airtight container at room temperature for up to three days to maintain freshness and texture.
- → Are these suitable for gluten-free diets?
Use gluten-free cake mix and confirm all decorations are gluten-free to adapt for gluten sensitivities.