 Pin It
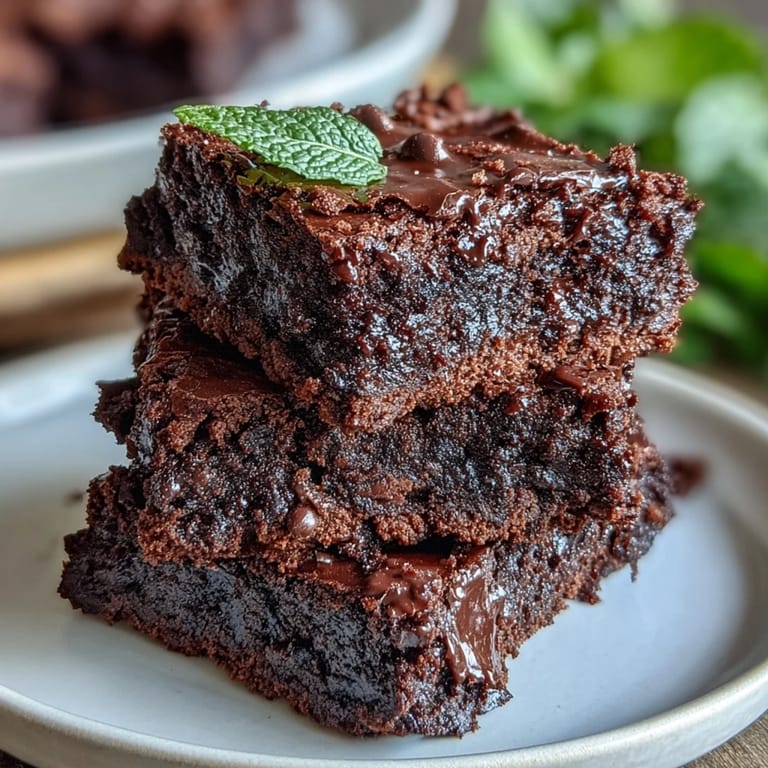
 My neighbor showed up at my door three days before St. Patrick's Day with a box of Andes mints and a mischievous grin, asking if I could turn them into something chocolate and green for her office party. I'd never paired mint with brownie bites before, but standing in my kitchen that afternoon, the peppermint extract hit the air and suddenly it made perfect sense. These little fudgy squares became an instant obsession, and now I make them every year without fail.
I still think about the look on my coworker's face when she bit into one of these at the office party last year, her eyes going wide like she'd discovered something secret. She texted me the recipe request before lunch was over, and I realized these weren't just brownies anymore; they were the kind of thing people actually remember you for making.
Ingredients
- All-purpose flour (3/4 cup): This is your structure, the quiet backbone that keeps everything from becoming a greasy puddle in the oven.
- Unsweetened cocoa powder (1/2 cup): Don't skimp here; the good stuff makes a noticeable difference in depth and richness.
- Baking powder (1/2 tsp) and salt (1/4 tsp): These aren't optional flavor add-ons, they're chemical workers that lift the bites and balance the sweetness.
- Unsalted butter (1/2 cup, melted): Melting it first creates a silky, fudgy crumb instead of a cakey one.
- Granulated sugar (1 cup): This is your sweetness and moisture provider all in one.
- Eggs (2 large, room temperature): Cold eggs won't blend smoothly; let them sit out while you prep and they'll emulsify beautifully into the batter.
- Vanilla extract (1/2 tsp) and peppermint extract (1/2 tsp): The vanilla plays nice with chocolate, while peppermint creates that cool, festive punch.
- Green food coloring (2–3 drops, optional): This is purely for the St. Patrick's Day vibe, but honestly it makes them look intentional and celebratory.
- Mini chocolate chips (1/2 cup, plus more for topping): Mini chips distribute more evenly than regular ones, so you get chocolate in every single bite.
- Chopped Andes mints or mint chocolate pieces (1/4 cup, optional): These add texture and concentrated mint flavor that regular extract alone can't deliver.
Tired of Takeout? 🥡
Get 10 meals you can make faster than delivery arrives. Seriously.
One email. No spam. Unsubscribe anytime.
Instructions
- Prepare your oven and tins:
- Heat to 350°F and grease a mini muffin tin; this temperature is low enough to keep the centers fudgy while the edges set.
- Whisk your dry ingredients:
- Combine flour, cocoa powder, baking powder, and salt in a medium bowl, making sure no cocoa powder clumps are hiding in the corners. This distributes the leavening evenly so they rise predictably.
- Cream butter and sugar:
- Whisk melted butter with sugar until the texture changes slightly and looks smooth; this takes about a minute. The sugar crystals start dissolving, which adds to the brownie's structure.
- Add wet ingredients:
- Pour in room-temperature eggs, vanilla, and peppermint extract, whisking until the mixture is smooth and ribbon-like. If you're using food coloring, add it here and whisk until the green is even.
- Fold in dry ingredients:
- Gradually fold the dry mixture into the wet stuff with a spatula, stopping as soon as you don't see white streaks anymore. Overmixing creates tough, cake-like bites instead of fudgy ones.
- Mix in chocolate and mints:
- Stir in the mini chips and chopped Andes mints gently, distributing them as evenly as you can without overworking the batter.
- Fill and top:
- Spoon batter into muffin cups until about three-quarters full, leaving room for them to puff slightly. Sprinkle extra chocolate chips on top if you want them to catch the eye.
- Bake until just set:
- Bake for 13–15 minutes, watching for the edges to pull slightly away from the tin sides. A toothpick inserted in the center should come out with moist crumbs, not wet batter and not completely clean.
- Cool properly:
- Let them sit in the tin for 5 minutes so they firm up enough to handle, then transfer to a wire rack to cool completely. This prevents them from becoming dense and heavy.
 Pin It
 There's something about serving these at a party and watching people's faces light up when they realize it's mint chocolate in brownie form, not just St. Patrick's Day novelty. It becomes the thing people talk about for weeks afterward.
The Mint-to-Chocolate Balance
Getting the mint flavor right took me three test batches, and I learned that peppermint extract is stronger than it tastes in the bowl. The batter might smell subtly minty, but once baked, it develops into something more prominent; that's chemistry doing its thing. If you're hesitant, start with the 1/2 teaspoon called for here and increase by a quarter teaspoon next time if you want something mintier.
Storage and Keeping
These stay fresh for up to five days in an airtight container at room temperature, which is genuinely helpful if you're making them for a party and want to get ahead. I've kept them in the fridge for longer and they stay moist, but they do firm up more; letting them sit on the counter for ten minutes before eating makes a difference. The mint flavor actually seems to strengthen over a day or two, so the second day batch tastes even better than the first.
Customizing Your Batch
The beauty of these bites is how flexible they are once you understand the base. You can swap the Andes mints for finely chopped junior mints, or skip them entirely for a classic chocolate brownie with just the peppermint extract. I've made versions with dark chocolate chips instead of regular ones, and they take on a more grown-up, less sweet vibe that works beautifully for adult gatherings.
- If mint isn't your thing, replace the peppermint extract with almond extract or a splash more vanilla for a different flavor entirely.
- The green coloring is purely optional; you can make these look like regular brownies if you prefer subtlety over St. Patrick's Day theatrics.
- For a nuttier version, you can fold in finely chopped pistachios or almonds, though check for allergen concerns if you're bringing these to shared events.
 Pin It
 These brownie bites have become my St. Patrick's Day signature, the thing I'm known for bringing to parties. They prove that simple recipes with a little creativity can become something people actually crave.
Recipe Questions & Answers
- → How do I enhance the mint flavor in these bites?
Increase the amount of peppermint extract carefully to avoid overpowering the chocolate and maintain balance.
- → Can I substitute Andes mints with other ingredients?
Yes, mint-flavored chocolate bars or chopped mint chocolates work well as alternatives.
- → What type of pan is best for baking these bites?
A mini muffin tin or liners ensure the bites hold shape and bake evenly.
- → How should I store the brownie bites?
Place them in an airtight container to keep them fresh for up to five days.
- → Are these bites suitable for vegetarians?
Yes, they contain no meat and fit a vegetarian diet, using ingredients like eggs and butter.