Pin It
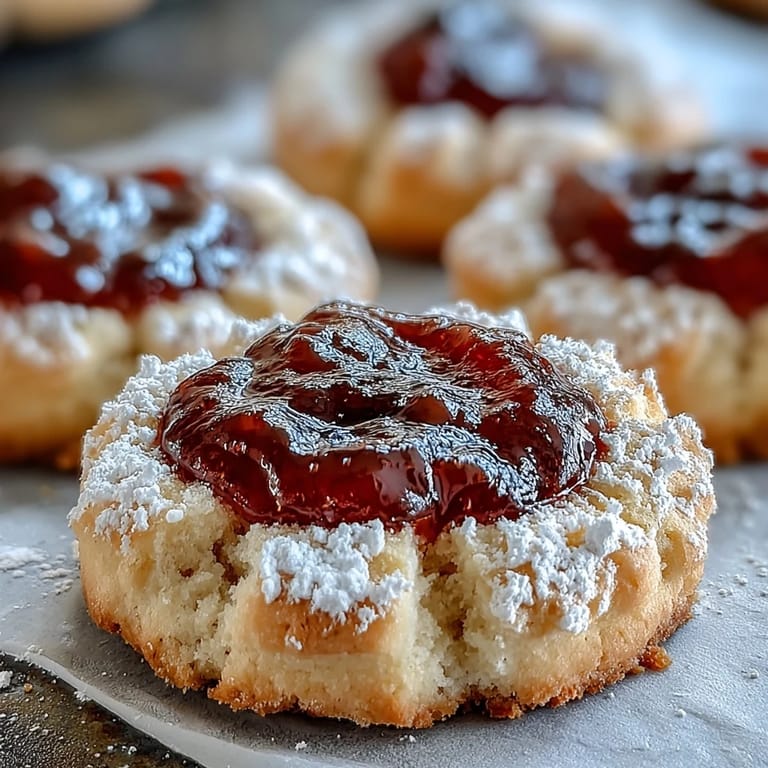
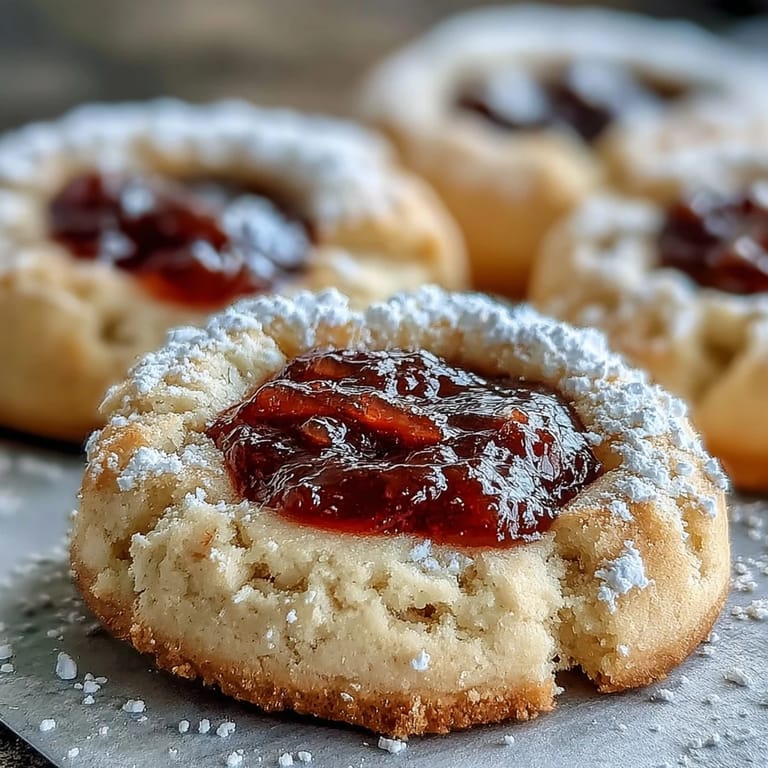
 My tía María used to make these little guava thumbprint cookies every Christmas, and the smell of buttery dough mixing with that tart tropical jam would fill her entire kitchen by mid-morning. I watched her work the dough with practiced hands, pressing each indent with her thumb like she was leaving a tiny signature on every single cookie. Years later, when I finally tried making them myself, I realized those weren't just cookies—they were her way of saying she cared, pressed into butter and flour and time.
I brought a batch to my neighbor's book club once, nervous because I'd only made them twice before, and they disappeared before anyone even finished their coffee. One person asked if I'd bought them from a bakery, which was probably the highest compliment I could've received—not because they were perfect, but because they tasted like someone cared enough to make them from scratch.
Ingredients
- Unsalted butter, softened: This is your foundation—softened means it creams easily with sugar, trapping tiny air pockets that make the cookies tender rather than dense.
- Granulated sugar: Don't skimp here; it helps create that delicate crumb and gives the dough structure to hold the guava filling without collapsing.
- Egg yolk: One yolk adds richness and helps bind everything together, while keeping the cookies from becoming cakey.
- Vanilla extract: A teaspoon of good vanilla rounds out the buttery flavor and lets the guava sing instead of competing.
- All-purpose flour: Measure it correctly by spooning and leveling—too much flour makes them tough, and nobody wants a tough thumbprint cookie.
- Salt: A quarter teaspoon seems small, but it's the secret handshake that makes the butter taste more buttery and the guava more complex.
- Unsweetened cocoa powder (optional): If you go the chocolate route, replace exactly 2 tablespoons of flour with cocoa—any more and the dough becomes dry and crumbly.
- Guava jam or paste: Softened is the keyword here; if your paste is thick straight from the jar, warm it gently so it spoons easily into those little thumbprints.
Tired of Takeout? 🥡
Get 10 meals you can make faster than delivery arrives. Seriously.
One email. No spam. Unsubscribe anytime.
Instructions
- Set your oven and prep your stage:
- Preheat to 350°F and line your baking sheet with parchment paper—this prevents sticking and lets the bottoms bake evenly without burning.
- Cream the butter and sugar:
- Beat them together for about 2 to 3 minutes until the mixture looks pale and fluffy, like you could spread it on toast. This creaming step is where the magic happens—you're aerating the dough so the cookies stay tender.
- Wake up the dough with egg and vanilla:
- Add the egg yolk and vanilla, beating just until everything is incorporated and smooth. Don't overbeat once you add the flour—you're going for a soft dough, not a workout.
- Bring the flour together gently:
- Mix in the flour and salt slowly, stirring by hand or on low speed until a soft dough forms without any visible flour streaks. If you're adding cocoa for the chocolate base, blend it in now along with the flour.
- Shape your cookies:
- Scoop tablespoon-sized portions and roll them between your palms into smooth balls, then space them 2 inches apart on your prepared sheet. The cookies will spread slightly, so don't crowd them.
- Make the thumbprints:
- Press your thumb or the back of a small spoon firmly into the center of each ball to create a deep pocket—go about halfway down, but don't push through to the bottom. A little wobble in the cookie is fine and actually looks more handmade.
- Fill with guava:
- Spoon about half a teaspoon of guava jam or softened paste into each indentation—don't overfill, or it'll ooze out during baking and caramelize on the baking sheet. A little spillover is okay and creates a nice glossy edge.
- Bake until the edges turn golden:
- Bake for 12 to 14 minutes; the edges should be just barely golden while the centers stay pale and tender. Pull them out when they're still slightly soft to the touch—they'll firm up as they cool.
- Cool with patience:
- Let them sit on the hot baking sheet for 5 minutes to set, then transfer to a wire rack to cool completely. They'll continue to harden slightly, reaching that perfect snap-and-crumble texture.
 Pin It
 My cousin once brought homemade torticas to a family dinner, and for the first time I understood that food isn't just about taste—it's about showing up in someone's kitchen, using your hands, taking the time. These cookies do that without pretending to be something they're not.
The Guava and Butter Balance
The magic of these cookies lives in the push and pull between sweetness and tang. The buttery cookie base is rich and almost neutral, giving the guava room to shine with its bright, slightly salty-sour personality. When they're fresh, that contrast is sharp and exciting; as they sit for a day, the flavors get cozier with each other, and the guava softens into something almost molten in the center. I learned this by accident the first time I made them—I baked a batch and then forgot about them overnight, only to discover the next day that they'd somehow become even better.
Playing with Flavor Variations
The chocolate base version is entirely different in personality—it becomes almost like a ganache situation, where the cocoa creates a subtle earthiness that makes the guava taste even brighter and more tropical by comparison. I've also experimented with raspberry jam, apricot preserves, and even a mango paste, and they each bring their own mood to the cookie. The structure stays the same, but the story changes depending on what's in the center, which is kind of beautiful.
Storage and Sharing Wisdom
These cookies stay fresh in an airtight container for about 5 to 7 days, though they rarely last that long once people know they're sitting around. I've learned that dusting them with powdered sugar right after they cool adds a little elegance and extra sweetness if you're giving them as a gift. They also freeze beautifully, either baked or unbaked, which means you can have homemade cookies ready anytime someone unexpected stops by.
- Store them in a single layer if possible, or separate layers with parchment paper so they don't stick together.
- Let frozen baked cookies come to room temperature before eating—they'll recover their tender texture as they warm up.
- If baking from frozen, add 1 to 2 extra minutes to the baking time and watch the edges carefully.
 Pin It
 These little torticas have a way of turning an ordinary afternoon into something worth remembering. Make them once, and you'll understand why they've been passed down through families and kitchens for generations.
Recipe Questions & Answers
- → What makes Torticas de Guayaba different from regular thumbprint cookies?
The distinctively tropical guava filling sets these Cuban cookies apart. Guava's unique sweet-tart flavor profile creates a bright contrast against the buttery, vanilla-forward dough. The jam caramelizes slightly during baking, developing deep fruity notes that complement the tender crumb. While traditional thumbprints often use raspberry or apricot, guava brings authentic Latin American character.
- → Can I make the dough ahead of time?
Absolutely. The dough benefits from chilling—wrap it tightly and refrigerate for up to three days, or freeze for up to three months. Chilled dough may need a few minutes at room temperature before scooping and rolling. If freezing, thaw overnight in the refrigerator before proceeding with shaping and baking.
- → How do I prevent the guava filling from overflowing during baking?
Don't overfill the indentations—about half a teaspoon per cookie is sufficient. The jam will bubble and spread as it heats. If using guava paste rather than jam, soften it first with a splash of warm water to reach a spoonable consistency. Making a deeper well with your thumb or spoon also helps contain the filling.
- → What's the best way to store these cookies?
Once completely cooled, store in an airtight container at room temperature for up to five days. Layer parchment paper between cookies if stacking to prevent sticking. The buttery dough softens slightly over time, which many find preferable. For longer storage, freeze unbaked balls of dough on a sheet, then transfer to a freezer bag and bake directly from frozen, adding a minute or two to the baking time.
- → Can I make these without an electric mixer?
Yes. A sturdy whisk and some elbow grease work perfectly—cream the butter and sugar until pale and fluffy, which typically takes 3 to 5 minutes by hand. The dough is forgiving and doesn't require extensive mixing. Ensure the butter is truly softened to room temperature for easier creaming without equipment.