 Pin It
 I discovered this dessert on a crisp October afternoon when my neighbor arrived at my door with a tart pan and an apologetic smile—she'd promised to bring dessert to a dinner party but had overcommitted herself. What she handed me was a scribbled note with the bare bones of this recipe and a challenge: could I pull it together in an hour? I could, and more importantly, I became obsessed. There's something about weaving those paper-thin apple slices into a lattice that feels like solving a delicious puzzle, and the moment someone tries that first bite—the honeyed walnuts, the tender apples, the buttery crust—their eyes light up in a way that makes the effort completely worthwhile.
The first time I made this for a proper gathering, I was nervous about transferring that delicate lattice without destroying it. My hands were shaking a little as I slid the parchment onto the tart, and honestly, one corner did tear slightly. But here's what I learned: that imperfection made it look more handmade, more real, and somehow more inviting. Everyone around that table felt like they were eating something I'd genuinely crafted, not something from a pastry shop. That's when I knew this recipe would become a keeper.
Ingredients
- All-purpose flour (1 1/4 cups): The foundation of your crust—make sure it's measured by weight if possible, as this gives you more consistency from one bake to the next.
- Unsalted butter, cold and cubed (1/2 cup): Cold butter is non-negotiable here; it creates those flaky, tender layers that make people close their eyes when they bite into the crust.
- Granulated sugar (2 tbsp for crust): Just enough to give the crust a subtle sweetness without overpowering the filling and apples.
- Salt (1/4 tsp for crust): This tiny amount brightens all the flavors and prevents the crust from tasting flat.
- Ice water (3–4 tbsp): Keep it genuinely icy; I fill a glass with ice water before I start, so it stays cold.
- Walnuts, chopped (1 cup): Toasting them lightly before chopping brings out their natural nuttiness, though I often skip this step and they're still delicious.
- Honey (1/4 cup): This sweetens the walnut layer and adds a luxurious, almost silky texture that makes people wonder what you did differently.
- Light brown sugar (2 tbsp): Adds a touch of molasses depth that plays beautifully with the cinnamon.
- Ground cinnamon (1/2 tsp for filling): Don't use the dusty stuff that's been in your spice rack for three years; fresh cinnamon makes a real difference here.
- Firm, sweet-tart apples like Honeycrisp or Granny Smith (3 large): The apple variety matters more than you'd think—you want something that holds its shape when sliced thin and has enough tartness to balance the honey.
- Lemon juice (1 tbsp): Prevents the apples from browning and adds a subtle brightness that keeps the dessert from feeling too heavy.
Tired of Takeout? 🥡
Get 10 meals you can make faster than delivery arrives. Seriously.
One email. No spam. Unsubscribe anytime.
Instructions
- Make your crust foundation:
- In a bowl, combine your flour, sugar, and salt—just a quick stir. Cut in the cold butter with a pastry cutter or even two forks until the mixture looks like coarse sand with some pea-sized butter pieces still visible. This texture is what gives you that flaky crust everyone loves.
- Bring the dough together:
- Add your ice water one tablespoon at a time, stirring gently after each addition until the dough just barely comes together. You'll know you're done when you can squeeze a handful and it holds. Don't overwork it—this is where people go wrong.
- Line and chill:
- Press the dough evenly into your 9-inch tart pan, working it up the sides with your fingertips. Prick the base all over with a fork to prevent puffing, then slide it into the fridge for 15 minutes while you preheat your oven to 375°F.
- Blind bake for structure:
- Line your crust with parchment paper and fill it with pie weights or dried beans—this keeps it from puffing up while it bakes. Bake for 12 minutes, then carefully remove the weights and parchment. Bake another 5 minutes until the bottom is lightly golden, then set it aside to cool slightly.
- Build the walnut layer:
- While the crust cools, mix your chopped walnuts, honey, brown sugar, cinnamon, and salt in a bowl. Spread this mixture evenly over the cooled crust—don't go all the way to the edges, leave a tiny border so the filling doesn't ooze out during baking.
- Prepare your apples:
- Peel your apples if you like (I usually do for a cleaner look), then core them and slice them as thin as you can manage—aim for about 1/8 inch. Toss the slices immediately with lemon juice, granulated sugar, and cinnamon so they stay bright and gain a little flavor.
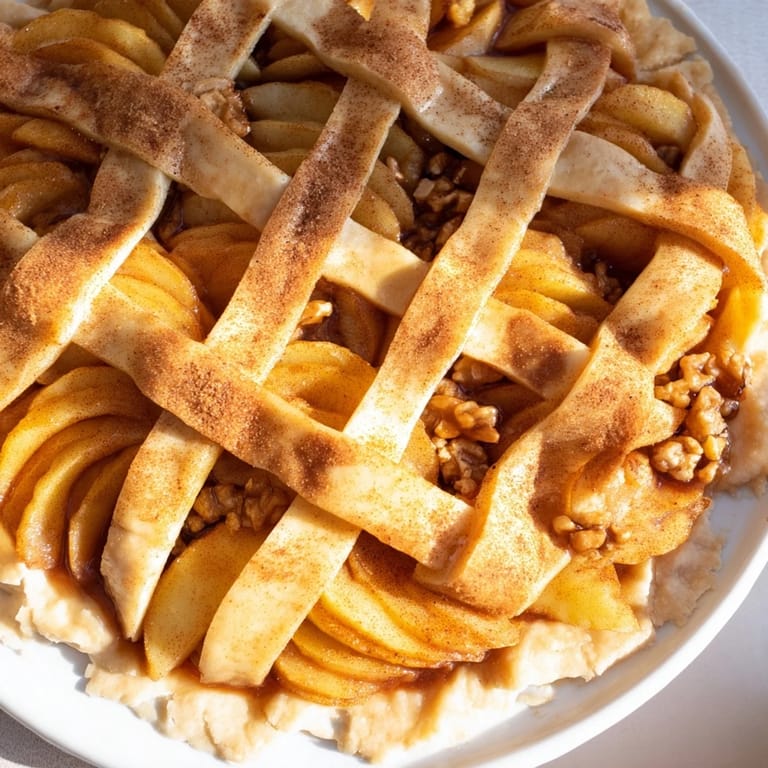
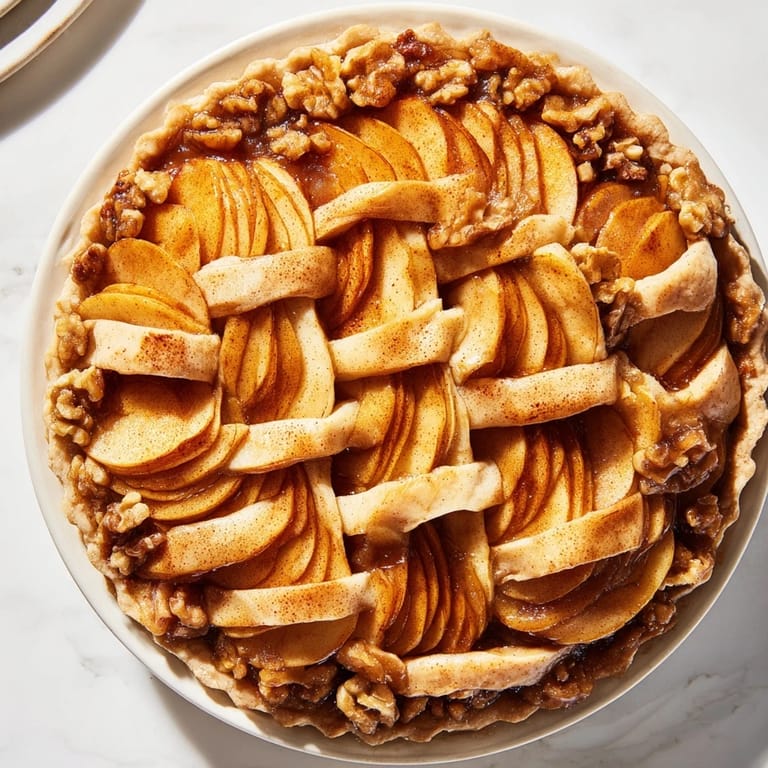
- Weave your lattice:
- This is the part that looks fancy but is actually quite meditative. On a large piece of parchment paper, lay out half your apple slices in parallel rows, overlapping them slightly. Then take your remaining slices and weave them over and under, creating that classic lattice pattern you see in bakery windows. Once you're happy with it, carefully slide the parchment (with lattice attached) onto the tart, then gently pull away the parchment and trim any apple slices that hang over the edge.
- Bake and watch for the moment:
- Cover the tart loosely with foil and bake for 20 minutes to give everything a chance to warm through and start melding together. Remove the foil and bake another 10 to 15 minutes until the apples are tender (they'll darken a bit) and the crust edges are a light golden brown. Let it cool for at least 20 minutes—this helps everything set.
- Finish and serve:
- If you want extra shine and a subtle apricot flavor, warm a few tablespoons of apricot jam and brush it over the cooled lattice. Serve warm or at room temperature, maybe with a drizzle of honey and a dollop of whipped cream or vanilla ice cream.
 Pin It
 I remember watching my mother study that first tart I'd made, turning the plate slowly in the light to admire the pattern. She didn't say much, just smiled quietly, and then she asked if I'd make it for her book club the following week. That simple request meant more to me than any compliment ever could—it meant I'd created something that felt worth sharing, something that made her proud to have me in her kitchen.
The Art of the Thin Slice
Getting those apples thin enough is genuinely half the battle. A sharp paring knife works, but honestly, a mandoline changes everything—it's one of those kitchen tools that seems intimidating until you use it and realize it saves you ten minutes and gives you perfectly even slices. Just watch your fingers, and maybe use the guard. I once got overconfident and paid for it with a small bandage on my knuckle, which taught me that even simple tools deserve respect.
Why the Crust Matters More Than You Think
A homemade crust isn't just about taste—though it absolutely is better than store-bought—it's about the experience of making something from scratch. The moment you press that buttery dough into the pan with your fingertips, you're investing yourself in this dessert. That investment shows in the eyes of whoever eats it, because they can taste the care. A good crust is what separates a tart you ate from a tart you'll remember.
Variations and Personal Touches
Once you've made this once, you'll start seeing opportunities to make it your own. Some seasons I use pecans instead of walnuts for a deeper, earthier flavor. Other times I add a tiny pinch of nutmeg to the walnut filling, or I'll use red apples for a more dramatic color contrast. The beauty of this recipe is that it's forgiving enough to accommodate your creative impulses while still holding together as something elegant and cohesive.
- Try brushing the baked lattice with a little warmed apricot jam for extra gloss and a subtle fruity note.
- Experiment with different apple varieties—Braeburn or Pink Lady apples bring interesting sweetness levels that change the whole vibe.
- A sprinkle of fleur de sel on top of the baked tart adds a surprising sophistication that guests will notice but not be able to name.
 Pin It
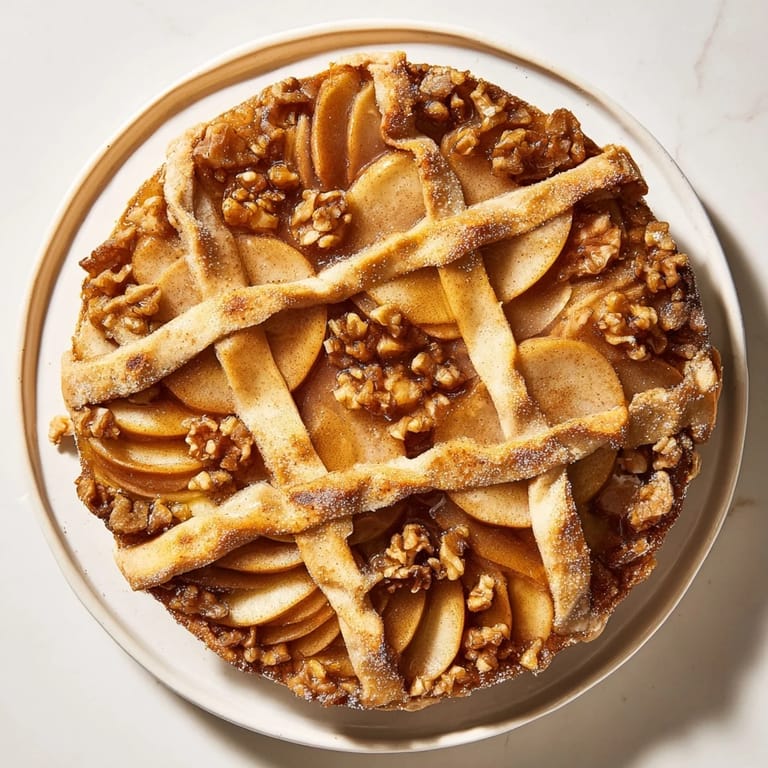
 There's something deeply satisfying about slicing into a tart you've woven with your own hands and seeing that golden crust give way to the honeyed walnuts and tender apples. This dessert has a way of turning an ordinary dinner into something worth remembering.
Recipe Questions & Answers
- → What type of apples work best for the lattice?
Firm, sweet-tart apples like Honeycrisp or Granny Smith hold their shape and provide balanced flavor.
- → How do I make the lattice top without breaking the apple slices?
Slice apples very thinly, about 1/8 inch thick, and weave carefully on parchment before transferring to the crust.
- → Can walnuts be substituted in the filling?
Pecans are a great alternative, offering a slightly different nutty flavor that complements the apple and honey.
- → What’s the best way to achieve a glossy finish on the lattice?
Brushing the baked lattice lightly with warmed apricot jam adds a beautiful shine and extra flavor.
- → Is there a gluten-free crust option?
Use a gluten-free flour blend for the crust to accommodate gluten sensitivities without sacrificing texture.
- → How should this dessert be served?
Serve warm or at room temperature, optionally with a scoop of vanilla ice cream or whipped cream for added richness.